Are you wondering how to program a rolling code garage door opener? Well, you’re in the right place! Garage door openers have come a long way, and rolling code technology provides enhanced security for your home. In this article, we’ll walk you through the simple steps to program your rolling code garage door opener. Let’s dive in!
Picture this: you’re driving home after a long day, and all you want is a smooth and convenient entry into your garage. That’s where a rolling code garage door opener comes in. Gone are the days of worrying about code theft and unauthorized access. With rolling code technology, your garage door opener generates a new code each time you use it, keeping your home safe and secure.
Now, let’s get to the exciting part – programming your rolling code garage door opener. Don’t worry; it’s easier than you might think. Whether you’re a tech-savvy teenager or a curious adult, our step-by-step instructions will guide you through the process. So, grab your garage door opener, and let’s unlock the secrets to programming it like a pro!
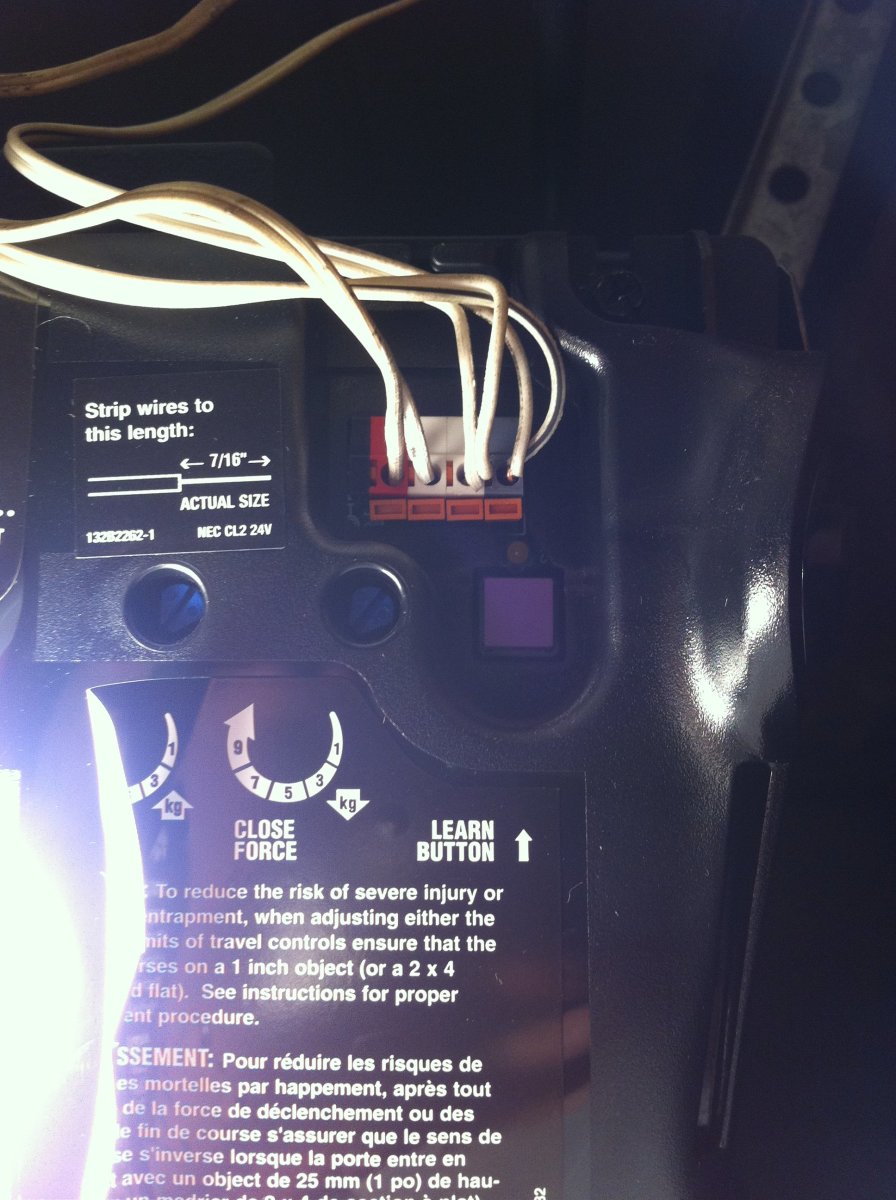
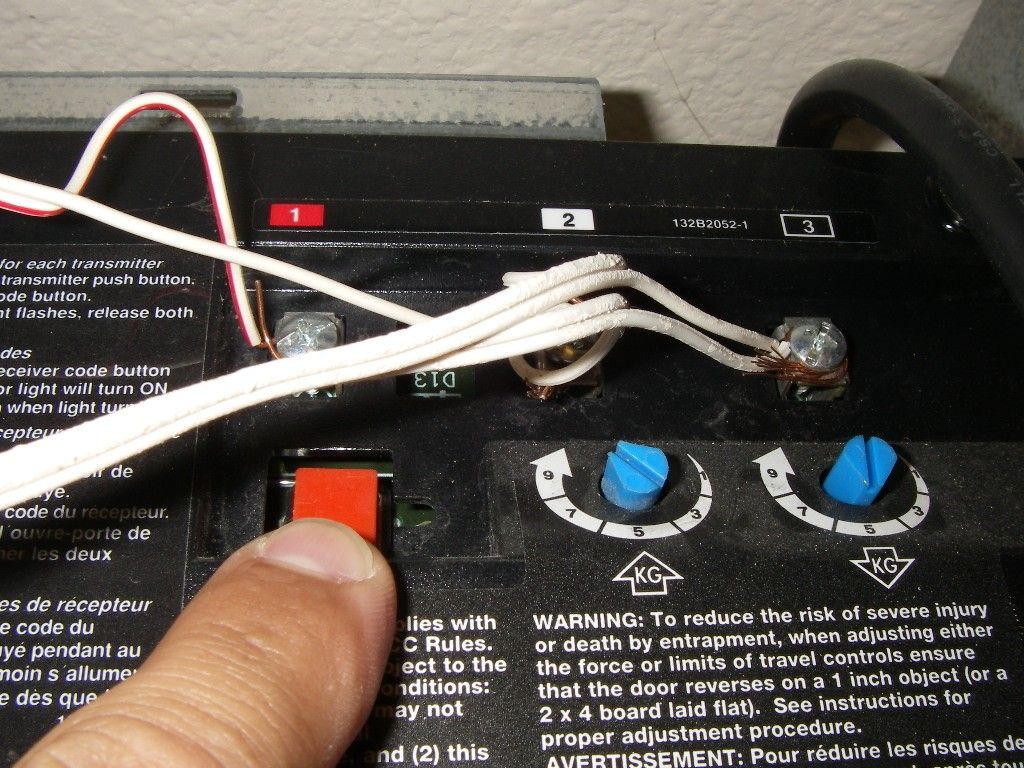
- Locate the “Learn” or “Program” button on your garage door opener.
- Press and release the “Learn” button, and a light should appear or blink.
- Within 30 seconds, press and hold the desired button on your remote control.
- Release the button when the garage door opener’s light blinks or turns off.
- Test the remote control to ensure it’s programmed correctly by opening and closing the garage door.
By following these steps, you can program your rolling code garage door opener successfully. Remember to consult your specific garage door opener’s manual if these steps differ from your model. Programming your garage door opener allows for secure access and peace of mind.

How to Program a Rolling Code Garage Door Opener?
Have you recently installed a rolling code garage door opener? Programming it might seem intimidating at first, but with the right steps, it can be a straightforward process. In this article, we’ll guide you through the necessary instructions to program your rolling code garage door opener. Whether you’re a beginner or a seasoned DIY enthusiast, our comprehensive guide will ensure that your garage door opener is up and running in no time.
Understanding Rolling Code Garage Door Openers
Before diving into the programming process, it’s essential to have a solid understanding of rolling code garage door openers. Unlike traditional garage door openers that rely on a fixed code, rolling code openers generate a new code each time the door is activated. This enhanced security feature prevents unauthorized access by constantly changing the code. Therefore, it’s crucial to program your rolling code garage door opener correctly, ensuring that it syncs with the receiver in your garage.
1. Locate the Programming Buttons
To begin programming your rolling code garage door opener, you need to identify the programming buttons on both the opener and the remote control. These buttons are typically located on the opener’s main unit and the remote control. Refer to the user manual or manufacturer’s instructions to find the specific location of these buttons for your particular model.
1.1 Programming Button on the Opener
The programming button on the opener is usually found on the motor unit. You might need a ladder to reach it, depending on how high your garage door opener is installed. The button is often labeled as “Learn,” “Program,” or “Set.” Press and hold this button until the indicator light on the opener starts flashing. The duration for holding the button may vary, so consult your user manual for precise instructions.
1.2 Programming Button on the Remote Control
On the remote control, the programming button is typically found on the back or hidden under a cover. Look for a small button labeled “Learn,” “Program,” or “Sync.” Press and hold this button until the indicator light on the remote control starts blinking. Make sure the remote control is within range of the opener during this process.
1.3 Syncing the Opener and Remote Control
Once the programming buttons on both the opener and the remote control are activated, it’s time to synchronize them. Press the desired button on the remote control that you wish to program (e.g., “Open” or “Close”). The indicator light on the opener should flash to confirm successful programming. Test the remote control by pressing the programmed button, and the garage door should respond accordingly. Repeat this process for any additional remote controls you want to program.
2. Resetting the Opener
In some cases, you might need to reset your rolling code garage door opener before programming it. This step is typically required if you’re setting up a new opener or if you’re experiencing issues with the existing programming. Follow these steps to reset the opener:
2.1 Disconnect Power
To ensure your safety, disconnect the power to the garage door opener by unplugging it from the power outlet or turning off the circuit breaker that supplies power to the opener.
2.2 Clear the Memory
Locate the “Learn” or “Program” button on the opener and press and hold it for about 10-15 seconds. The indicator light on the opener might blink or change color to indicate that the memory has been cleared.
2.3 Reprogram the Opener
After resetting the opener, follow the programming steps mentioned earlier to sync the opener and remote control. Remember to consult your user manual for specific instructions related to your opener model.
3. Troubleshooting Tips
If you encounter any issues while programming your rolling code garage door opener, here are some troubleshooting tips to help you out:
1. Make sure that the opener and the remote control are within range of each other during the programming process.
2. Confirm that the batteries in the remote control are fresh and properly installed.
3. Check for any obstructions or physical damage that could be preventing the signal from reaching the opener.
4. If the indicator light on the opener doesn’t flash during programming, consult the user manual for troubleshooting instructions specific to your opener model.
Remember, if you’re still having trouble programming your rolling code garage door opener, it’s best to reach out to the manufacturer’s customer support or consult a professional for assistance. Garage door opener systems can vary, so it’s important to get the right guidance for your specific model.
Tips for Maintaining Your Rolling Code Garage Door Opener
Once you’ve successfully programmed your rolling code garage door opener, it’s important to maintain it properly to ensure its optimal performance and longevity. Here are some helpful tips for maintaining your garage door opener:
1. Regularly Inspect Hardware
Periodically inspect the hardware, including springs, cables, rollers, and tracks, for any signs of wear or damage. Tighten any loose nuts or bolts and ensure smooth operation by lubricating moving parts according to manufacturers’ recommendations.
2. Keep the Opener Clean
Dust and debris can accumulate on the opener and interfere with its functionality. Regularly clean the opener, removing any dirt or grime using a soft cloth or a gentle cleaning solution. Be careful not to spray any liquid directly onto the opener.
3. Test Safety Features
Modern garage door openers are equipped with safety features such as auto-reverse mechanisms and sensors. Regularly test these features to ensure they’re functioning correctly. Place an object, like a roll of paper towels, in the door’s path. If the door doesn’t reverse when it comes into contact with the object, immediately contact a professional for repairs.
4. Change Access Codes
To enhance security, change the access codes for your garage door opener periodically. Refer to the user manual for instructions on how to change the codes. Avoid using easily guessable codes and opt for a combination that is unique to you and your family.
5. Schedule Professional Maintenance
Consider scheduling professional maintenance for your rolling code garage door opener at least once a year. A trained technician will thoroughly inspect the system, make any necessary adjustments, and ensure that all components are in proper working order.
By following these tips, you can keep your rolling code garage door opener in top shape and ensure that it functions reliably for years to come.
In summary, programming a rolling code garage door opener requires a few simple steps. By understanding the process, locating the programming buttons, and following the instructions provided by the manufacturer, you can easily program your opener and enjoy the convenience and security it provides. Additionally, regular maintenance and care will ensure its continued smooth operation.
Key Takeaways – How to Program a Rolling Code Garage Door Opener?
- Make sure your garage door opener and remote are compatible with rolling code technology.
- Locate the “Learn” button on your garage door opener motor unit.
- Press and hold the “Learn” button until the indicator light starts flashing.
- Quickly press the button on your remote that you want to use to control the door.
- Wait for the indicator light on the motor unit to stop flashing, indicating successful programming.
Frequently Asked Questions
**Introduction:**
Programming a rolling code garage door opener can seem intimidating, but it doesn’t have to be. By understanding the process and following a few simple steps, you can easily program your garage door opener to work with your remote control. Here are some common questions and helpful answers to guide you through the process.
1. How do I know if my garage door opener uses a rolling code system?
To determine if your garage door opener uses a rolling code system, look for a “learn” or “program” button on the motor unit. Typically, this button is located near the antenna wire. If your opener has this button, it is likely equipped with a rolling code technology. Another way to check is by referring to the user manual or contacting the manufacturer for confirmation.
Answer:
If you’re unsure about your garage door opener’s type, the learn or program button is a reliable indicator. Don’t hesitate to consult the user manual or reach out to the manufacturer for clarification. It’s important to know the type of system your opener uses before attempting any programming.
2. How do I program a rolling code garage door opener with a remote control?
To program your remote control to work with a rolling code garage door opener, start by clearing the opener’s memory. Locate the “learn” or “program” button on the motor unit, press and release it. Then, within 30 seconds, press and hold the desired button on your remote control until the opener lights blink or you hear a click sound. This indicates the programming was successful. Test the remote to ensure it operates the garage door smoothly.
Answer:
Programming a rolling code garage door opener with a remote control involves a two-step process: clearing the opener’s memory and synchronizing the remote. Following the steps mentioned will allow you to pair the remote with the opener successfully.
3. Can I program multiple remotes for a rolling code garage door opener?
Yes, most rolling code garage door openers allow multiple remotes to be programmed. You can typically add additional remote controls by following the same process used to program the initial remote. Remember to clear the opener’s memory first, then synchronize each remote following the manufacturer’s instructions.
Answer:
You can easily program multiple remotes for a rolling code garage door opener. Simply clear the opener’s memory and then follow the programming steps for each additional remote control. This way, you can have multiple remotes operating your garage door opener simultaneously.
4. What should I do if the programming process doesn’t work?
If the programming process for your rolling code garage door opener doesn’t work, there could be a few reasons why. First, ensure that you are following the steps correctly, as even a small mistake can cause the programming to fail. Additionally, check the battery in your remote control to ensure it has enough power. If the problem persists, consult the user manual or contact the manufacturer for troubleshooting assistance.
Answer:
If you’re having trouble with the programming process, double-check the steps you’ve followed to troubleshoot any errors. Confirm that the battery in your remote control is not weak or dead. If these steps still don’t resolve the issue, consult the user manual or contact the manufacturer for further assistance.
5. Can I program a rolling code garage door opener with a smartphone app?
Yes, many rolling code garage door openers are compatible with smartphone apps. These apps allow you to control your garage door from your phone and often offer additional features and functionalities. To program your opener using a smartphone app, follow the manufacturer’s instructions and ensure that your smartphone is compatible with the app.
Answer:
If your rolling code garage door opener supports smartphone app integration, you can program it using the respective app. Simply follow the instructions provided by the manufacturer, ensuring your smartphone is compatible with the app. Enjoy the convenience of controlling your garage door using your smartphone.

Summary
So, to sum it all up, programming a rolling code garage door opener is not as complicated as it sounds. With just a few simple steps, you can sync your remote control to your garage door, ensuring that only you can access it. Remember to consult your specific manufacturer’s instructions for detailed guidance. By following these steps, you’ll have your garage door opener up and running in no time!
In conclusion, programming a rolling code garage door opener is a manageable task that anyone can do. Just follow the instructions provided by your manufacturer, and you’ll have a secure and convenient garage door system. Don’t forget to enjoy the peace of mind that comes with controlling your garage door with a personalized rolling code.

